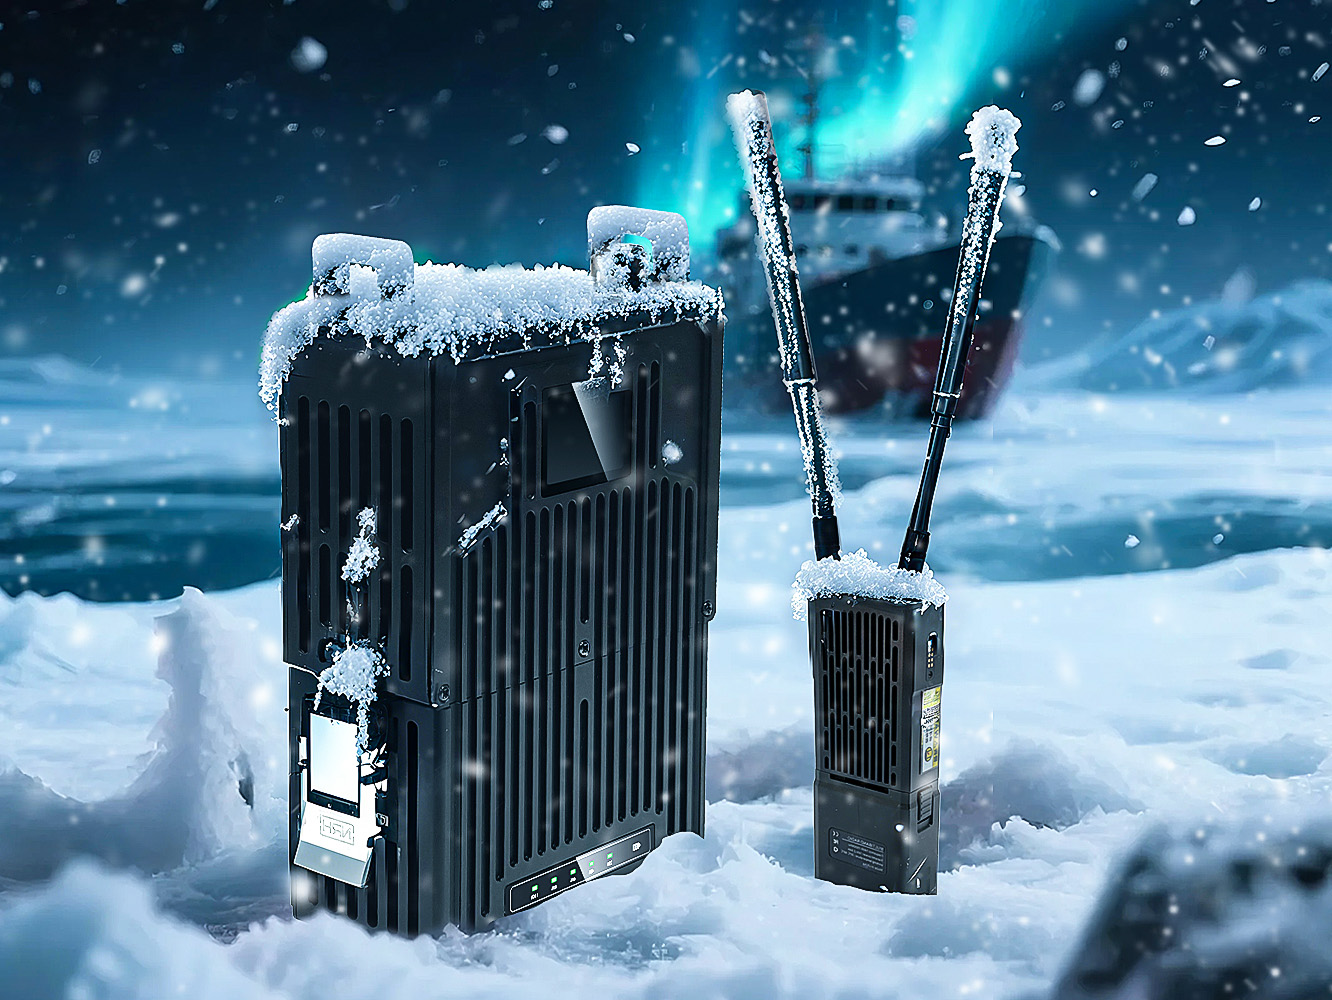


What Is an IP Mesh Radio and How Does It Work?
2025-10-24


Wireless bridge is a dedicated wireless transmission device for elevator wireless video and elevator Internet of Things transmission. Compared with the traditional elevator cable data transmission scheme, it has advantages such as strong anti-interference, long transmission distance, high cost performance, convenient construction, and strong maintainability. Now, let's introduce the installation and testing methods of the wireless bridge in the elevator:
For the wireless network bridge used for elevator monitoring, we usually configure it for the customers in advance. On the bridge, we will indicate the bridge IP and the bridge pairing number (the bridge IP is usually even for the transmitting end and odd for the receiving end. For example: 192.168.1.88 is the transmitting end bridge IP, 192.168.1.89 is the receiving end bridge IP. These two bridges will have the same number, such as: ①. Then the other pairs will be ②, ③... )

Step 1: Pre-installation inspection of wireless bridge:
① The transmitting end bridge is powered on, and the receiving end bridge is connected to the computer (the power POE port supplies power to the bridge, and the power POE port is connected to the bridge)
② Check the local connection status of the computer, modify the computer's IP. If the local connection status is abnormal, check whether the wiring is correct; otherwise, the bridge is faulty.
If the local connection status of the computer is normal, modify the computer's IP to make it consistent with the network segment of the bridge. Then click "OK". (The bridge IP is 192.168.1.21. The computer IP needs to be set to an IP other than 192.168.1.21, such as 192.168.1.99; the bridge IP is 192.168.20.21. The computer IP needs to be set to an IP other than 192.168.20.21, such as 192.168.20.99.)
③ Enter the background of the receiving end bridge, check the parameters. If there is a signal strength display, it indicates that the bridge is connected normally (enter the background by inputting the bridge IP in the browser address bar).
Step 2: Installation of Wireless Bridge:
The installation of the elevator monitoring wireless bridge can be carried out in two ways depending on the location of the monitoring center.
① The transmitting end bridge is installed on the top of the elevator car and is connected to the camera via network cables. The receiving end bridge is installed on the top of the elevator shaft and then connected to the monitoring center (applicable to the installation method where the monitoring center is located on the top floor).
② The transmitting end bridge is installed at the bottom of the elevator car and is connected to the camera via network cables. The receiving end bridge is installed at the bottom of the elevator shaft, and then connected to the monitoring center (suitable for installation in the lower floors where the monitoring center is located).
There should be no obstructions between the transmitting end and the receiving end network bridges, and the positions should be as aligned as possible in the vertical and horizontal directions.

Step 3: Wireless Bridge Configuration:
① Check the signal status
Go to the backend of the receiving end bridge to check the signal status. First, observe that the signal strength of the bridge should be as close to 0 as possible (values ranging from 0 to -70 can operate normally). Then, check that the sending/transmitting rate should be as close as possible to the rate of the bridge itself (as shown in the following figure, for a 150M bridge demonstration, the rate should be as close as 150Mbps as possible). Finally, check the transmission of CCQ (Client Link Quality) of the bridge. Generally, a rate of over 90% can ensure normal operation.
② Adjust the frequency (the signal is in normal condition and no adjustment is required)
If the working environment of the bridge is interfered with (with a transmission CCQ lower than 90%, or the AirMax quality being very low), the frequency needs to be adjusted to avoid interference. Try to modify it several times to reach the optimal state. Generally, there are 2.4G frequency band network hotspots in the surrounding area. Then, the bridge should be adjusted to the 2.3G frequency band.
Steps: Enter the wireless interface of the transmitting end bridge, change the frequency to 23XX. After modification, click the bottom right "Change" button, then click the upper right "Pop-up" button to save the parameters. Restart the transmitting end bridge. The receiving end bridge will automatically connect to the signal of the frequency where the transmitting end bridge is located. Continuously observe the signal status of the bridge. Make multiple adjustments and comparisons to achieve the best effect.